
A practical guide to the accessibility testing tools and workflow I use on every WordPress project before handoff. Covers axe DevTools, Lighthouse, WAVE, keyboard testing, and screen readers.
Accessibility testing is the part of WordPress development most developers skip entirely. Not because they do not care but because they do not have a clear process for it. It feels vague, it is hard to know where to start, and it is easy to convince yourself the site is probably fine.
It is usually not fine.
I have been building a consistent accessibility testing workflow into every project I work on. This post covers the exact tools I use and the order I use them in — from automated scanning to manual keyboard testing to screen reader checks.
Why Automated Testing Is Not Enough
Before getting into the tools, one important caveat. Automated accessibility testing tools catch roughly 30 to 40 percent of WCAG issues. The rest require human judgement — does this make sense when read out of context, does keyboard navigation feel logical, does this image convey meaning that a screen reader user is missing.
Automated tools are the starting point, not the finish line. A site that passes every automated check can still fail a real user accessibility test badly.
The workflow I use combines automated scanning, manual keyboard testing, and selective screen reader testing to cover as much ground as practically possible before a site goes live.
Automated Testing Tools
axe DevTools
axe DevTools is a free Chrome extension and my first stop on every project. Install it, open it from the Chrome extensions panel on any page, and run a scan. It categorises issues by severity — Critical, Serious, Moderate, and Minor — and links each one directly to the affected element on the page.
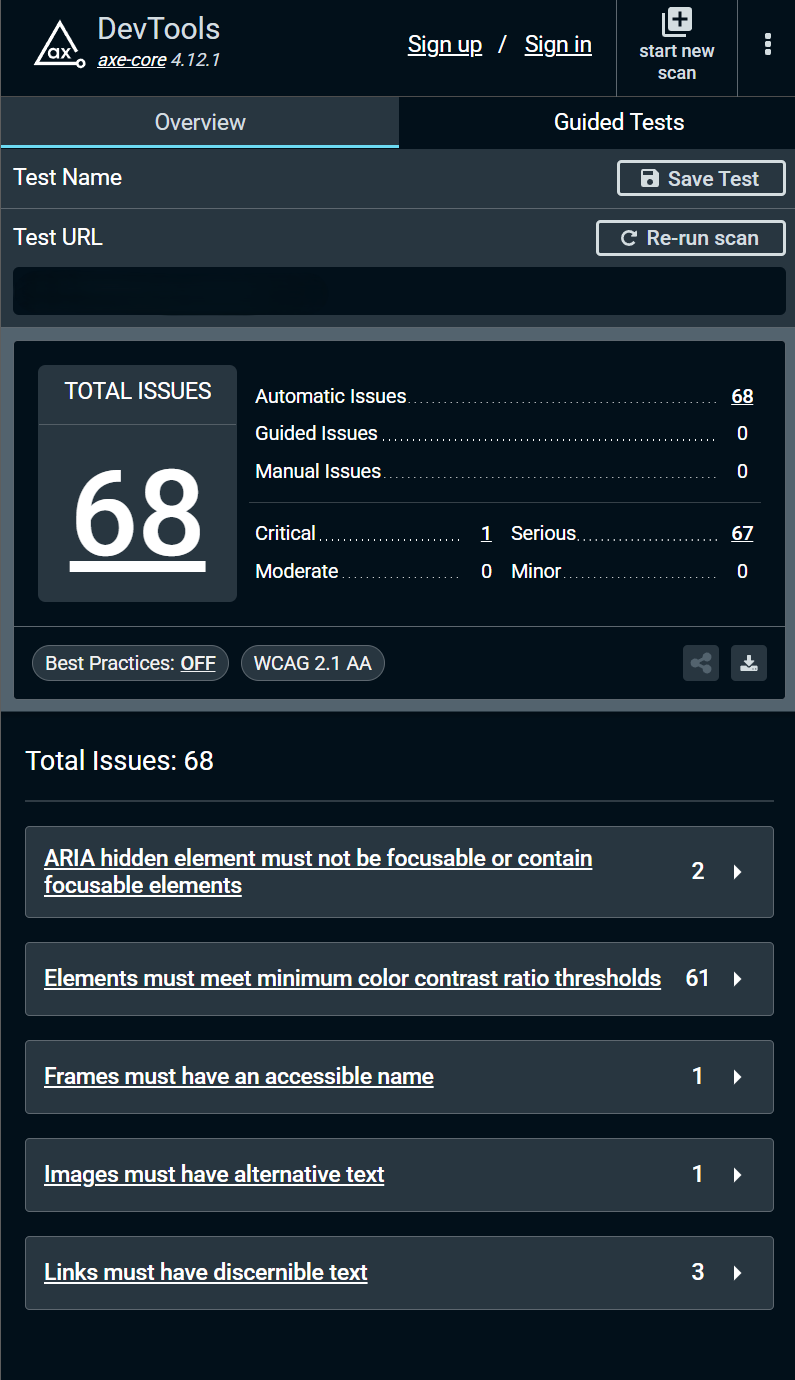
What makes axe DevTools better than most alternatives is the low false positive rate. Every issue it flags is a real issue. It does not cry wolf. When you see 68 issues in the results you know all 68 are worth fixing.
The Guided Tests tab is also useful for issues that cannot be fully automated — it walks you through manual checks for things like keyboard navigation and focus order with clear instructions.
Lighthouse
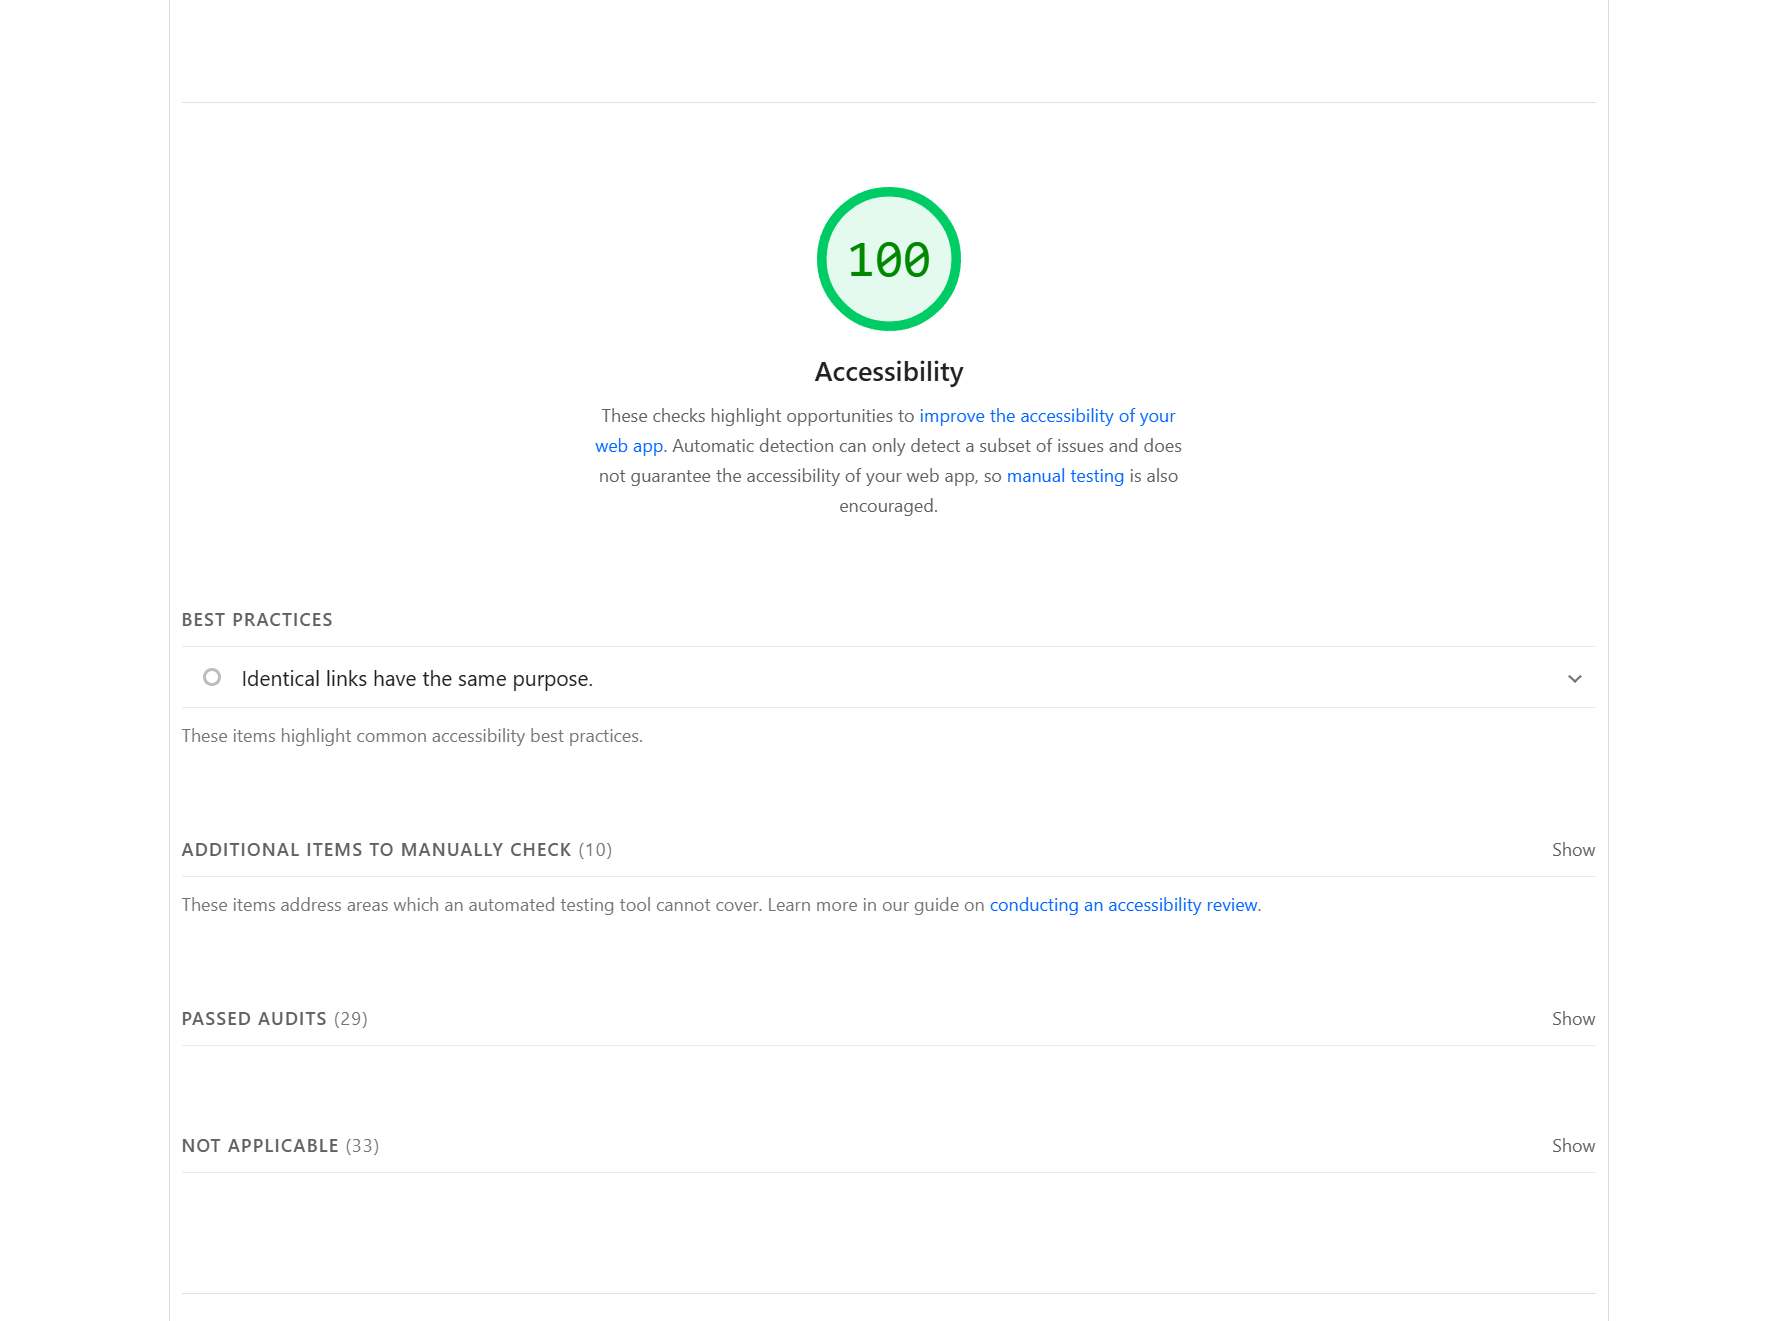
Lighthouse is built into Chrome DevTools — press F12, go to the Lighthouse tab, select Accessibility only, and run the audit. It gives you a score from 0 to 100 and a list of failing criteria with links to documentation.
The advantage of Lighthouse over axe is the score. It gives you a single number that is easy to track across projects and over time. I target 100 on every project before handoff. Anything below 90 means something significant is failing.
Lighthouse and axe overlap on many checks but not all. Running both catches more issues than either alone.
WAVE
WAVE by WebAIM is a free browser extension that overlays visual indicators directly on the page showing errors, alerts, and structural elements. It is particularly good for showing heading hierarchy visually and spotting missing form labels.
Where axe and Lighthouse give you a list, WAVE shows you the issues in context on the actual page. For clients who want to understand accessibility issues without reading a technical report, WAVE is the easiest tool to walk them through.
Manual Testing
Keyboard Testing
Unplug your mouse. Navigate the entire page using Tab to move forward, Shift and Tab to move backward, Enter to activate links and buttons, and Space to activate buttons and toggle checkboxes.
Every interactive element must be reachable. Every action must be completable. The focus indicator must be visible at all times — you should always be able to see exactly where you are on the page.
This takes five to ten minutes per page and catches issues no automated tool will ever find. A skip navigation link that does not work. A modal that traps focus. A dropdown that opens on hover only and is completely unreachable by keyboard.
Chrome DevTools Accessibility Panel
In Chrome DevTools, select any element, go to the Elements panel, and click the Accessibility tab in the right panel. This shows the accessibility tree for that element — its computed role, name, and ARIA attributes exactly as a screen reader would interpret them.
I use this when I need to verify that a specific element is being announced correctly. Particularly useful for custom Gutenberg blocks where I have set role and aria-label attributes manually and want to confirm they are being applied correctly.
Colour Contrast Analyser
The Colour Contrast Analyser is a free desktop application by TPGi. You use an eyedropper to pick foreground and background colours from anywhere on your screen and it calculates the contrast ratio instantly, showing whether it passes WCAG AA and AAA thresholds.
It is more reliable than browser-based contrast checkers for checking text over images or gradients where the background colour is not a single value. I use it whenever a design uses text over a semi-transparent overlay or a gradient background.
Screen Reader Testing
Screen reader testing is the most realistic way to understand what a visually impaired user actually experiences on a site. I use two.
NVDA
NVDA is a free screen reader for Windows. Combined with Chrome it is the most common screen reader and browser combination used by real users, which makes it the most important combination to test with.
Basic NVDA testing does not require deep expertise. Install it, open your site in Chrome, and listen. Tab through the page and listen to what gets announced. Navigate by headings using the H key. Navigate by landmarks using the D key. If something sounds wrong or confusing it needs fixing.
VoiceOver
VoiceOver is built into every Mac and iPhone — no installation required. Press Command, F5 on Mac to toggle it on and off. On iOS triple-click the side button.
Testing with VoiceOver on iOS is particularly valuable because a significant portion of screen reader users are on mobile. If your WordPress site works correctly with VoiceOver on an iPhone you are covering a large percentage of real-world screen reader usage.
My Testing Workflow
I run these checks in this order on every project before handoff:
First I run axe DevTools and fix everything it flags. Then I run Lighthouse and address any additional issues it finds. Then I run WAVE for a visual check of heading structure and form labels. Then I do a full keyboard test of every page. Then I check contrast on any non-standard colour combinations with the Colour Contrast Analyser. Finally I do a quick VoiceOver pass on mobile if the project has a significant mobile audience.
This full workflow takes around thirty to forty five minutes on a typical WordPress site. It is part of every project handoff checklist.
The Tools at a Glance
axe DevTools — free Chrome extension, automated scan, low false positives, best starting point
Lighthouse — built into Chrome DevTools, accessibility score, good for tracking progress
WAVE — free Chrome extension, visual overlay, good for heading structure and form labels
Keyboard testing — no tools required, catches focus and navigation issues automated tools miss
Chrome DevTools Accessibility panel — inspect ARIA tree per element, good for verifying custom block markup
Colour Contrast Analyser — free desktop app by TPGi, accurate contrast checking including over images and gradients
NVDA — free Windows screen reader, most common real-world screen reader and browser combination
VoiceOver — built into Mac and iOS, no installation required, essential for mobile screen reader testing
The Bottom Line
No single tool covers everything. The combination of automated scanning, keyboard testing, contrast checking, and screen reader testing is what gets you as close to genuine WCAG 2.1 AA compliance as practically possible before a real user finds the gaps.
The good news is most of these tools are free and the workflow becomes fast once it is a habit. Thirty to forty five minutes per project is a small investment compared to the cost of retrofitting accessibility after launch.
Building a WordPress site that needs to meet WCAG 2.1 AA standards? Get in touch.
Share this article